Andrew
Walpole
Principal Web
Developer &
Engineering
Manager
Designer
Leader
Teacher
Learner
Maker
Fast and Simple APIs with Deno KV
In a previous post, I dove into how you can build a like button with Cloudflare Workers and KV. Well, there’s finally a new rival service in town: Deno KV. Let’s take a look!
In the process of building that same likes service in Deno KV, I have to say I’m quite impressed with how quick and easy it was to go from code to production. I’ll outline the steps it took to get things going and then walk through the details.
- Sign up for a free Deno Deploy account
- Create a new project and choose the
"Hello World"template with theTry with Playgroundbutton. Similar to Cloudflare’s online editor, you get plopped right into an online coding environment.
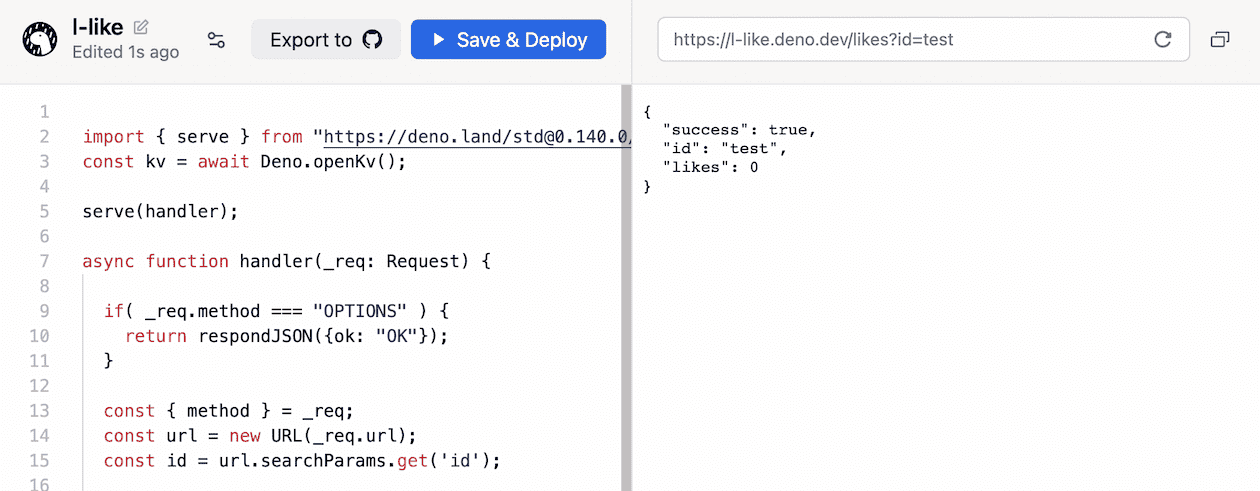
- From there you can code, test and deploy your API until you have it just right. And then optionally you can move that code over to GithHb when you’re ready to graduate from the playground experience.
It’s also worth noting that you can do all of this from your local machine via deployctl which is Deno Deploy’s CLI tool. You just need to create a project and generate an API key in your account to deploy with a command like:
deployctl deploy --token=<YOUR API KEY> --project=<YOUR PROJECT NAME> main.ts
A neat benefit of doing it this way is that you can locally run your code with deno run --allow-net=:8000 --unstable main.ts and even Deno KV will work for full local end-to-end testing.
Writing the API Code
Whether you’re working locally or on the Deno playground, setting up our likes API is pretty straightforward.
At the heart of it all, your Deno Deploy code is running a Deno script. So if you want to do web stuff, you’ll want to set up a server. That server will have a handler function where you can encounter any request on your project and make it all do something.
And for good measure, check out the respondJSON() helper function I have included which will enable CORS on your endpoint and respond with JSON data. This is very important if you want some other website to be able to use your API:
import { serve } from "https://deno.land/[email protected]/http/server.ts";
const kv = await Deno.openKv(); //Initialize Deno KV

async function handler(_req: Request) {
  //Do servery stuff here
}

//start the server
serve(handler);

//A helper to return CORS enabled JSON data
function respondJSON( data, status = 200 ) {

  const corsHeaders = {
    'Access-Control-Allow-Origin': '*',
    'Access-Control-Allow-Headers': '*',
    'Access-Control-Allow-Methods': 'GET,HEAD,POST,OPTIONS',
  };

  return new Response(JSON.stringify(data, null, 2),{
    status,
    headers: {
      ...corsHeaders,
      'content-type': 'application/json;charset=UTF-8',
    },
  });
}
We’re building a little API, so the servery stuff we want to do is parse out the request information and see if it matches up with a command like retrieving or posting likes:
async function handler(_req: Request) {

  //Browsers love to pre-hit endpoints with an "OPTIONS" method
  //this will ensure we're handling that with CORS
  if( _req.method === "OPTIONS" ) {
    return respondJSON({ok: "OK"});
  }

  //the _req object has lots of goodies to use
  //We parse the url sent in to access the parthname and params
  const { method } = _req;
  const url = new URL(_req.url);
  const id = url.searchParams.get('id');

  //Define some routes and functions to call when they're hit:
  const routes = {
    '/likes': {
      GET: async (id) => await getLikes(id),
      POST: async (id) => await postLike(id)
    },
    '/likes/reset': {
      GET: async (id) => await resetLikes(id),
    }
  };

  //Now, if we match a route and have an id
  //we can call the appropriate route function
  if( routes[url.pathname] && id ) {
    const responseData = await routes[url.pathname]?.[method](id);
    return respondJSON( responseData );
  }

  //oops, if something went wrong return an error
  return respondJSON({ success: false }, 404);
}
Ok, that’s the API setup: it has some route logic and knows what functions to call. Let’s now set up those functions and finally get to using Deno KV!
//Returns the number of likes an Id has
async function getLikes(id) {

  //Query the value based on the Id
  const res = await kv.get(['likes', id]);

  //If the Id doesn't exist in KV set it to 0
  if( res.value === null ) {
    await kv.set(['likes', id], 0);
  }

  return { success:true, id, likes: res.value ?? 0 };
}

//Adds a like to an Id
async function postLike(id) {

  //Query the current likes and then set it to current+1
  const { likes } = await getLikes(id);
  const res = await kv.set(['likes', id], likes+1 );

  //oops the operation failed
  if( !res.ok ) {
    return { success: false, likes }
  }

  return { success: true, id, likes: likes+1 };
}

//Resets the Id's likes to 0.
//TODO: Add a secret password parameter check here
async function resetLikes(id) {

  const res = await kv.set(['likes', id], 0 );

  if( !res.ok ) {
    return { success: false }
  }

  return { success: true, id, likes: 0 };
}
And that’s it! You can see the production code on github, and see the API in action below:
See the Pen Likes Counter with Deno KV by Andrew (@walpolea) on CodePen.
Overall, I’m really happy with Deno KV. It’s simple to use, and paired with the Deno Deploy platform it’s quick to get up and running with. If I have to critique something, I do think the documentation could use some zhuzhing, as I did get turned in circles for a few days before figuring things out properly.
I look forward to playing more with Deno KV and the Deploy service. Especially for you front-end folks, this is an incredibly powerful back-end solution to lean on when you need that little bit of persistent or shared state for the thing you’re building.