Andrew
Walpole
Principal Web
Developer &
Engineering
Manager
Designer
Leader
Teacher
Learner
Maker
Building a Like Button with Cloudflare Workers
Previously, I touched lightly on Cloudflare Workers. In this post, we’ll get deeper into the weeds and see how we can use them to build a small portable like button (exactly the one you see down in the bottom right of the page – sorry RSS folks).
What are Cloudflare Workers and Cloudflare KV?
Cloudflare workers are edge functions (serverless functions that run on an edge server, so they’re super duper fast). They’re just a bit of Javascript that can do anything Javascripty you want and return a value, like some json or even an entire webpage. By default, when you create one, you get a url that you can curl/fetch/browse-to that will trigger the function to run. You can also disable that url and point specific routes of your website to trigger the function when they are navigated to.
Cloudflare KV is a separate-but-related offering from Cloudflare. The KV stands for Key/Value, and it’s essentially a flat, persistent, key/value store that Cloudflare can make available to your Cloudflare workers. This is sort of a big deal. There are some great serverless function offerings out there, but none make it quite so easy to bolt on a small, fast, synchronized database as Cloudflare has (Firebase comes close, but if you know of any others, I would love to hear about them).
Prerequisites
There’s a small bit to get set up before you can use workers and KV:
- You need a cloudflare account (it’s free!)
- The sign up process wil set you up with a free
*.workers.devsub-domain, which is where all of your worker urls will live, if you are using an existing Cloudflare account, you can set that up in the workers section of the dashboard. - Once you have that set up, you’re ready to create and use workers – up to 100,000 runs per day for the free tier!
- You can also follow the getting started guide, which will walk you through setting up the Workers CLI so you can develop and publish workers from your local machine. In this tutorial, we’re skipping that and doing everything (even writing the code!) on the Cloudflare dashboard.
Create the worker
Under the workers tab of your Cloudflare account dashboard is where you can create workers and manage KV. In there, click the, Create a Service button. If you don’t see that button, you may still need to set up your workers.dev sub-domain; follow the steps.
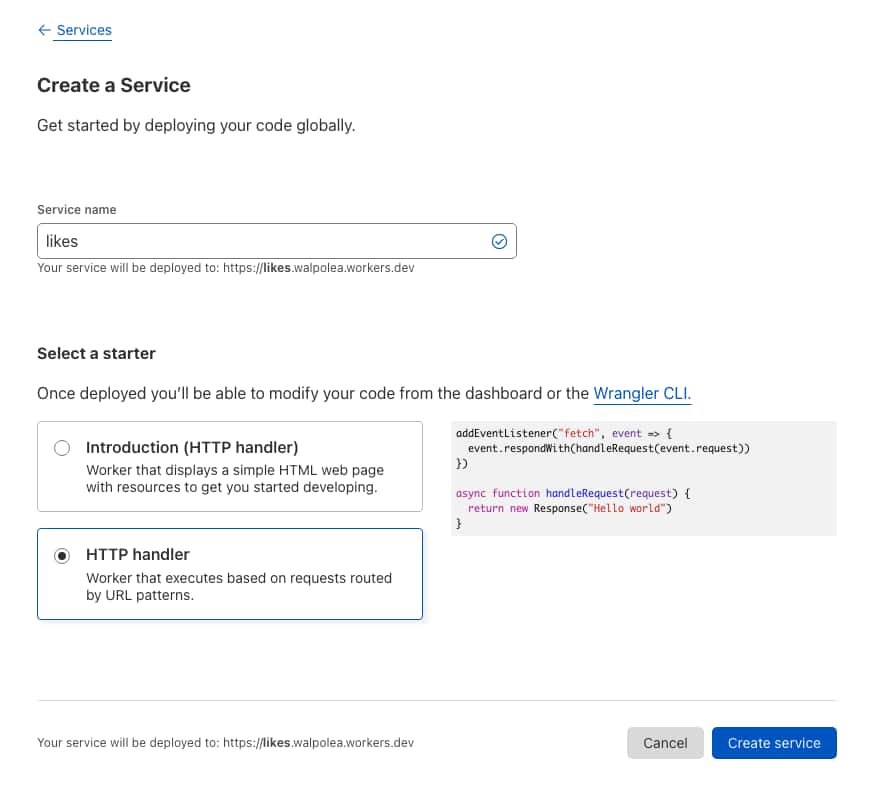
Give your service a name, I’ll call mine, likes. The name dictates the function endpoint, so in this case it will be https://likes.walpolea.workers.dev. Then choose a starter, I’ll go with the bare HTTP Handler which will provide a small boilerplate function to get going with. Hit Create Service and your worker is ready for use!
Create the KV
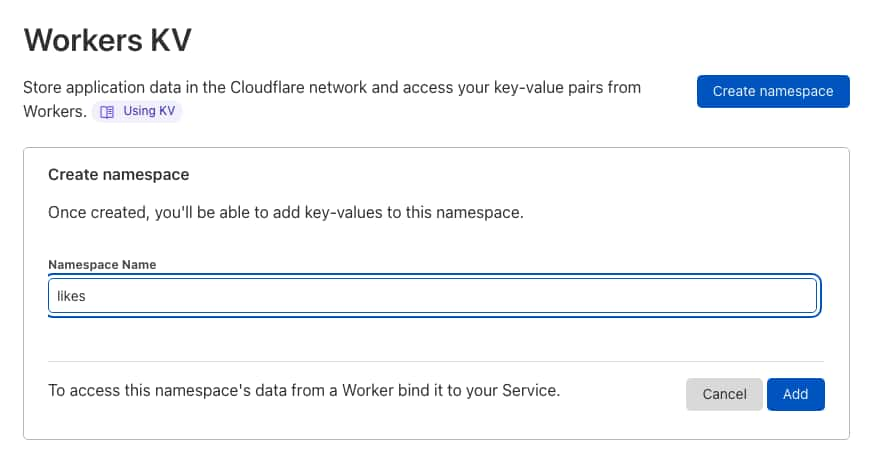
On the dashboard menu, under Workers, choose, KV and click the Create Namespace button. Give the namespace a name, in this case, likes and click, Add. You now have a KV store set up, you can use the dashboard to see the values and even update them manually if you need to.
Hook KV up to the Worker
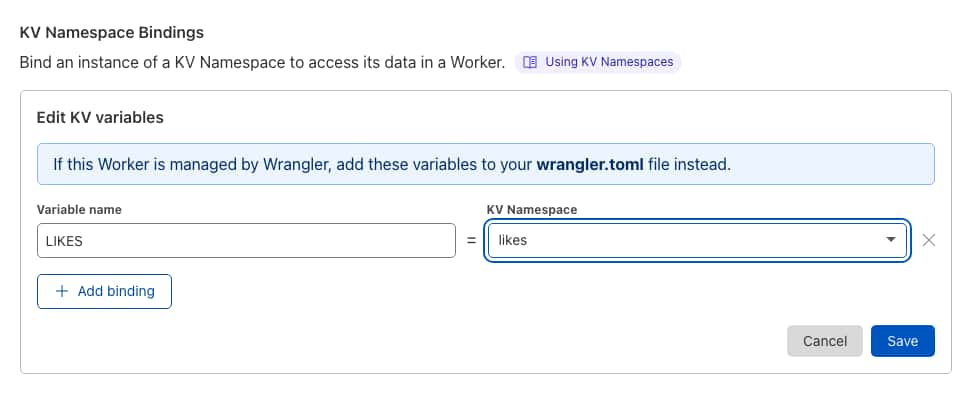
One more important step to get KV working with your worker. Go into your Workers Overview, click the likes worker. In the detailed worker dashboard, go to Settings and then the Variables tab. Theres a section at the bottom called KV Namespace Bindings. You need to provide a variable name, LIKES and connect it to your likes KV Namespace.
Write the worker code
We’re going to write the worker directly on Cloudflare. On the worker details dashboard you were just on, click the, Quick Edit button. I could tediously walk you through building the code line-by-line, but I would rather just show it all to you. If you have some base knowledge of serverless functions it should be pretty straight-forward. So here it is:
//this is the very first thing to run, a fetch event happened
//it calls handleRequest which needs to figure out how to
//respond back to the client
addEventListener("fetch", event => {
  event.respondWith(handleRequest(event.request))
});

async function handleRequest(request) {

  //This function will handle both getting (Get) and setting (Post) our likes
  //Use request.method to check which it is.
  switch(request.method) {

    //This is required because our preflight checks
    //need cors enabled
    case "OPTIONS":
      return responseJSON({ok: "OK"});
    break;

    //This is where we look up and return the likes value
    //based on the key (title) passed in as a url param
    case "GET":

      const { search } = new URL(request.url);
      const params = new URLSearchParams(search);

      if( params.has('title') ) {
        const title = params.get('title');
        let likes = await getLikes(title); //see below
        likes = likes ? likes : 0; //if it's null, it's 0

        return responseJSON({title, likes});
      }

    break;

    //This is where we increment the number of likes
    //based on the key (title) which is passed in as json data
    case "POST":

      const { title } = await request.json();
      let likes = await incrementLikes(title); //see below

      return responseJSON({ title, likes });

    break;
  }

  //a catch-all response if something weird happens
  return responseJSON({error:"Something went wrong"});
}

//returns a json response object with data as the payload
function responseJSON( data ) {
  return new Response(JSON.stringify(data),{

    //this is the secret to enableing cors
    //feel free to set the origin to a value that you trust
    const corsHeaders = {
      'Access-Control-Allow-Origin': '*',
      'Access-Control-Allow-Headers': '*',
      'Access-Control-Allow-Methods': 'GET,HEAD,POST,OPTIONS',
    };

    headers: {
      ...corsHeaders,
      'content-type': 'application/json;charset=UTF-8',
    },
  });
}

//This function retrieves the number of likes
//in the KV based on the key (title)
async function getLikes( title ) {
  //get the value from KV
  const likes = parseInt( await LIKES.get(title, { type: "text"}));
  return likes;
}

//This function increments the number of likes
//in the KV based on the key (title)
async function incrementLikes( title ) {
  let likes = await getLikes(title);

  if( likes ) { //does this have a value, or is it null?
    likes++;
  } else { //the first time it's liked set it to 1
    likes = 1;
  }

  //update the value in KV
  await LIKES.put( title, likes.toString() );

  return likes;
}
The worker is set up to handle two types of requests:
GETwith a?title=SOME-KEYparameter, which will return the number of likes stored in that key.- and
POSTwith a json payload of{ title: 'SOME-KEY' }which will increment the number of likes at that key.
You absolutely could split these out into two separate workers, but this seemed easier to show off. If you get stuck, I have to shoutout the Cloudflare docs, they are great and have a large variety of examples that show you exactly what code you need.
Hooking up the front-end
Once again, I’m opting to keep it short here and just show you. You can pretty easily start using your new likes API with a couple of fetch commands. Here’s a pen showing the like button in action:
See the Pen Petite-vue Like Button powered by Cloudflare Workers and KV by Andrew (@walpolea) on CodePen.
The secret sauce is really in these two functions that hit the worker we built:
const endpoint = 'https://likes.walpolea.workers.dev/';

async function loadLikes( title ) {
  return (await ( await fetch(`${endpoint}?title=${title}`)).json()).likes;
}

async function postLike( title ) {
  if( !this.likeAdded ) {
    const response = await ( await fetch(endpoint, {
      method: 'POST',
      headers: {
        'Accept': 'application/json',
        'Content-Type': 'application/json'
      },
      body: JSON.stringify({title})
    })).json();

    this.likeAdded = true;
    return response.likes;
  }
}
Wrap-up
If you made it this far, whew, thanks for joining me on this journey. Feel free to actually like this post down in the bottom right (sorry RSS folks). I hope you can see how easy and powerful Cloudflare workers and KV are. You could use them in so many ways beyond this simple example.